
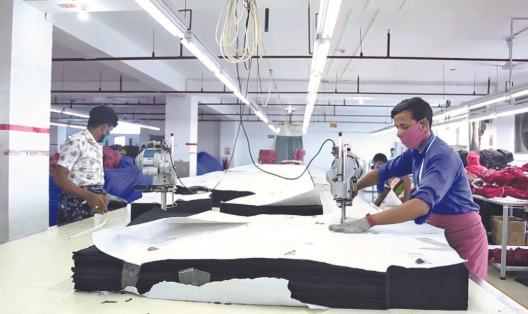
The cutting room is one of the most important control points in apparel production.
Once fabric is cut, many decisions become difficult—or impossible—to reverse.
Incorrect cuttable width can create cutting and sewing problems. Poor shade control can mix incompatible garment panels. Excessive spreading tension can change panel dimensions after cutting. Incorrect marker selection can increase fabric consumption or make pattern matching impossible. And weak numbering or bundling control can carry cutting-room mistakes directly into the sewing line.
For this reason, cutting should not be viewed simply as the process of converting fabric rolls into garment panels.
The cutting room is where fabric information, garment patterns, production quantity, and material utilization must come together accurately before sewing begins.
Good cutting-room management therefore begins before the first lay is spread.
Cutting Starts With Fabric Inspection Information
The cutting room should not receive only fabric rolls.
It should also receive the information learned from inspecting those rolls.
Fabric inspection may identify differences in:
- Lot
- Roll
- Shade
- Usable or cuttable width
- Fabric defects
- GSM or weight
- Bow or skew
- Shrinkage
- Roll length
- Usable quantity
- Other fabric-specific conditions
This information can directly affect spreading and cutting decisions.
If inspection results remain only in a quality-control report and are not communicated to the cutting room, an important opportunity for production control is lost.
Fabric inspection information has value only when it follows the fabric into production.
Shade, width, defects, and roll conditions identified during inspection should become cutting-room instructions—not remain only on an inspection report.
For more on evaluating fabric before it is released to cutting, see Fabric Inspection and the 4-Point System: How to Control Fabric Quality Before Cutting.
Cuttable Width Must Be Accurate
One of the most important pieces of information for cutting is the actual cuttable width.
The total or finished fabric width is not necessarily the same as the width that can safely be used for marker placement and cutting.
If the marker is planned too close to the usable fabric edge, cutting becomes difficult.
Pattern pieces near the edge may not have sufficient fabric underneath them throughout the lay.
This can lead to inaccurate panels, edge-related cutting defects, recutting, and problems during sewing.
At the same time, leaving excessive unused width is not a good solution.
If the marker is unnecessarily narrow compared with the actual usable fabric width, fabric utilization decreases.
Consumption can increase, yield can worsen, and the amount of fabric required to complete the order may increase.
The objective is therefore not to use the widest possible marker or the safest narrow marker.
It is to establish the correct practical cuttable width for the actual fabric and garment.
For more on how usable fabric width affects consumption, yield, and garment cost, see Fabric Width Explained: How Width Affects Consumption, Yield, and Cost.
Too Tight and Too Loose Can Both Be Expensive
Cuttable width requires balance.
A marker that uses nearly every available millimeter may appear efficient on paper.
But if the fabric edge is inconsistent or the actual usable width varies from roll to roll, that theoretical efficiency can create cutting loss.
On the other hand, excessive safety allowance can waste fabric across every ply and every lay.
Across a large order, even a small width difference can become commercially significant.
Cuttable width should therefore be based on actual fabric condition—not only nominal specification.
The cutting team should know what width was actually observed during fabric inspection and whether that width is consistent enough for the planned marker.
Fabric Utilization Is More Than Marker Efficiency
Marker efficiency is an important measurement, but it does not tell the complete story of actual fabric utilization.
A marker may show an excellent efficiency percentage while the cutting room still loses fabric through:
- Excess edge allowance
- End loss
- Splicing
- Defect removal
- Shade separation
- Short remnants
- Pattern matching
- Poor spreading
- Recutting
- Cutting errors
This means the best marker on a computer screen does not automatically create the lowest actual fabric consumption.
Real fabric utilization is determined by what happens from the roll through spreading and cutting.
The objective should therefore be to connect marker efficiency with actual cutting-room fabric usage.
Relax Stretchable Fabric Before Cutting
Elastic and stretchable fabrics require particular attention before spreading and cutting.
Fabric may retain tension from knitting, finishing, rolling, transportation, or storage.
If that fabric is cut while still under unstable tension, the cut panels may change dimension after they relax.
In many production environments, 24 to 48 hours of relaxation is commonly used as a practical starting point for elastic or stretchable fabrics.
However, this should not be treated as one universal rule for every fabric.
The appropriate relaxation requirement should consider:
- Fabric construction
- Stretch and recovery
- Fiber content
- Finishing
- Roll condition
- Supplier recommendation
- Product requirement
- Previous production history
The purpose is not simply to wait for a certain number of hours.
The purpose is to allow the fabric to reach a stable condition before its dimensions are committed to cutting.
Relaxation Can Be Lost During Spreading
Proper relaxation does not guarantee proper cutting if tension is reintroduced during spreading.
This is particularly important with stretchable fabrics.
If fabric is pulled while being spread, it may temporarily become longer or narrower.
The marker may fit correctly while the fabric remains under tension.
But after cutting, the panels can relax and change dimension.
This creates an important production principle:
Fabric relaxation can be correct, but poor spreading tension can put the problem back into the fabric.
Relaxation and spreading should therefore be managed as one connected process:
Relaxation → Controlled Spreading → Cutting
Spreading Tension Must Be Controlled
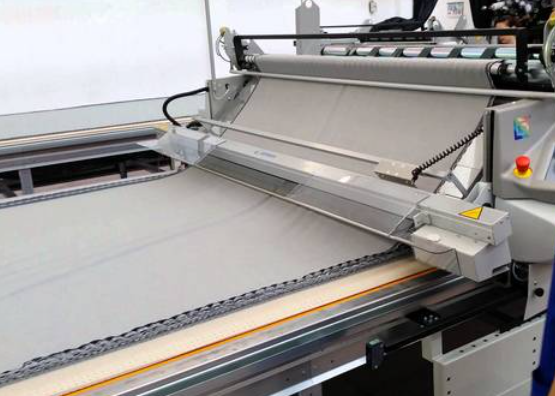
Manual spreading can produce acceptable results, but controlling tension consistently by feel requires considerable operator experience.
Even an experienced worker may have difficulty maintaining exactly the same tension across different rolls, lays, shifts, and fabric conditions.
For stretchable or tension-sensitive materials, an automatic spreading machine can provide more consistent control when properly set and operated.
Automation itself does not eliminate the need for supervision.
The cutting team still needs to monitor:
- Fabric alignment
- Edge position
- Tension
- Ply condition
- Wrinkles
- Fabric distortion
- Lay length
- Fabric behavior during spreading
The goal is not simply faster spreading.
It is repeatable spreading under controlled conditions.
Shade Control Must Begin Before the Lay
Shade variation can become a serious garment-quality problem if it is not controlled before cutting.
The basic rule is to separate fabric according to applicable lot, roll, and shade information.
But there is an additional risk:
The same roll does not always guarantee the same shade throughout the entire roll.
Color or shade can sometimes change within a roll.
If fabric inspection identifies such a change, that information should be communicated to the cutting room.
The affected sections may need to be separated rather than treated as one continuous shade group.
This is why roll identification alone is not always enough.
Actual fabric condition must guide the cutting decision.
Shade Information Must Follow the Fabric
Shade control should not stop after inspection.
The information needs to remain connected to the material through spreading, cutting, numbering, bundling, and sewing.
A practical traceability flow may look like:
Fabric Inspection → Lot/Roll/Shade Identification → Lay Planning → Cutting → Numbering → Bundling → Sewing
If this chain breaks, panels from different shade groups may be mixed later in production.
Once incompatible panels are sewn into the same garment, the problem can become difficult and expensive to correct.
The objective is therefore not merely to identify shade variation.
It is to prevent incompatible shade groups from becoming one garment.
Plan the Lay Around Fabric Information
Lay planning should consider more than the required garment quantity.
The cutting team may also need to consider:
- Fabric lot
- Roll number
- Shade group
- Cuttable width
- Defect information
- Fabric length
- Marker length
- Size ratio
- Ply height
- Fabric direction
- Pattern-matching requirement
- Special cutting restrictions
A theoretically efficient lay can become impractical if it ignores the characteristics of the actual fabric rolls available.
For this reason, cutting planning should connect the production requirement with the fabric information already collected.
Not Every Fabric Can Use a Standard Marker
A standard solid fabric often allows relatively flexible pattern placement.
Special fabrics may not.
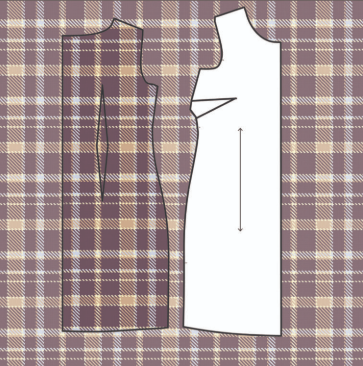
Stripe, check, plaid, engineered print, directional print, nap, one-way design, or other visual characteristics can require different marker rules.
For example, a garment made from striped fabric may require horizontal or vertical lines to match at specific seams or garment points.
This can affect:
- Pattern orientation
- Piece placement
- Marker efficiency
- Fabric consumption
- Cutting method
- Bundling
- Sewing sequence
A marker that achieves the highest theoretical efficiency may therefore be unacceptable if the finished garment does not meet the required visual alignment.
Stripe and Pattern Matching Require Specialized Cutting Knowledge
Pattern matching should be planned before cutting begins.
The cutting method depends on the fabric and garment design.
For certain stripe, check, or pattern-matched products, production may require specialized methods to keep visual reference points aligned.
Depending on the product and factory method, this may involve controlled mechanical positioning, pin or nail-based alignment methods, special marker arrangements, or cutting related left/right components together to reduce matching variation.
There is no single special-cutting method appropriate for every fabric.
The important principle is that the cutting method must reflect the actual matching requirement of the garment.
This requires technical understanding from marker planning through spreading and cutting.
Special Cutting Requirements Should Be Identified During Fabric Review
Special marker and cutting requirements should not be discovered only after the lay has already been prepared.
Fabric inspection and pre-production review provide opportunities to identify characteristics that will affect cutting.
These may include:
- Stripe repeat
- Check repeat
- Print repeat
- Directional design
- Nap
- Shade variation
- Bow or skew
- Width variation
- Fabric distortion
- Defect concentration
When such information is identified early, the cutting team can select the appropriate marker and spreading method before fabric is consumed.
This reduces last-minute changes and avoidable material loss.
Cutting Accuracy Affects Sewing Accuracy
Cutting quality does not remain in the cutting room.
If garment panels are inaccurately cut, the sewing line receives inaccurate components.
The sewing operator may then be forced to stretch, ease, trim, manipulate, or otherwise compensate for a cutting problem.
This can affect:
- Seam alignment
- Garment measurement
- Shape
- Symmetry
- Stripe or check matching
- Sewing efficiency
- Rework
- Final appearance
A sewing problem may therefore have started as a cutting problem.
This is why production teams should avoid treating cutting and sewing quality as unrelated subjects.
Cutting Quality Should Be Checked Before Bundling
After cutting, the cut components should be evaluated according to the product and quality requirement.
Areas may include:
- Panel shape
- Cutting accuracy
- Notches
- Drill marks
- Matching points
- Edge condition
- Size identification
- Pattern direction
- Stripe/check alignment
- Visible defects
The purpose is to prevent a cutting error from being multiplied through sewing.
If a panel needs to be recut, it is generally better to identify that requirement before the bundle enters the sewing line.
Numbering Protects Garment Identity
After cutting, individual components may look almost identical.
But they may not be interchangeable.
Panels can belong to different:
- Sizes
- Lots
- Rolls
- Shade groups
- Lays
- Garments
Numbering helps preserve the identity of cut components through the next stages of production.
This becomes especially important where shade variation exists.
If garment components are mixed after cutting, the sewing line may combine panels that should never have been assembled together.
Numbering is therefore not simply an administrative step.
It is part of traceability and quality control.
Bundling Should Preserve the Cutting Decision
Bundling organizes cut components for sewing.
But a good bundle does more than collect pieces.
It should preserve the decisions already made during fabric inspection, shade segregation, lay planning, and cutting.
Depending on the production system, bundle information may include:
- Style
- Color
- Size
- Lay
- Bundle number
- Quantity
- Shade group
- Other production identification
The exact system varies by factory.
The principle is that cutting-room control should remain visible when the components enter sewing.
Otherwise, careful shade segregation and lay planning can be undone by poor bundle control.
Recutting Should Be Controlled and Traceable
Recutting is sometimes necessary.
A panel may contain an overlooked fabric defect, cutting error, damaged edge, incorrect pattern alignment, or other unacceptable condition.
But recutting creates another shade and traceability risk.
Replacement panels should be cut from compatible material whenever required.
If a replacement piece is taken from an unrelated roll or shade group without control, the garment may pass construction but fail visually after assembly.
For this reason, recut panels should remain connected to the applicable garment, bundle, and shade information.
Cutting Quantity Is Not the Same as Usable Sewing Quantity
A cutting report may show that the required number of garment sets was cut.
That does not automatically mean the sewing line has the same number of usable garment sets.
Cutting defects, fabric defects, missing components, shade segregation, recutting, and bundle errors can reduce the quantity actually available for sewing.
The production team should therefore understand not only:
How many pieces were cut?
but also:
How many complete, correct, usable garment sets were released to sewing?
That difference can become important when managing order quantity and short-shipment risk.
Cutting Loss Can Affect Final Order Quantity
Fabric availability is finite.
If actual cutting consumption becomes higher than planned, the same fabric quantity may produce fewer garments than expected.
This can happen because of:
- Lower usable width
- Excess spreading loss
- Defect removal
- Shade restrictions
- Special pattern matching
- Poor marker execution
- Recutting
- Excess safety allowance
- Unexpected remnants
A small loss per garment may appear insignificant.
Across thousands of garments, it can become a meaningful shortage.
Cutting-room control is therefore directly connected to final order quantity as well as garment cost.
Cutting Room Data Should Be Compared With the Plan
Good cutting management requires feedback.
Planned consumption should be compared with actual fabric usage.
Planned quantity should be compared with usable cut quantity.
Expected marker efficiency should be compared with actual cutting performance.
Shade and defect losses should be recorded where relevant.
Recut quantities should also be monitored.
These comparisons help identify whether the problem comes from:
- Fabric
- Marker planning
- Spreading
- Cutting
- Quality
- Production control
Without this feedback, the same cutting loss may repeat across future orders.
Cutting Is a Production-Control Function
It is easy to think of the cutting room as a service department that supplies panels to sewing.
In reality, it controls several of the factory’s most important production variables.
It controls how fabric is converted into garment quantity.
It protects shade continuity.
It translates marker planning into actual consumption.
It affects sewing quality.
It affects traceability.
And it can influence whether the available fabric is sufficient to complete the order.
This makes cutting-room management relevant not only to cutting supervisors, but also to fabric teams, quality, production planning, costing, merchandising, and sewing management.
For a broader view of controlling garment production from cutting through shipment, see Apparel Production Management: How to Control Production from Cutting to Shipment.
Final Takeaway
Effective cutting-room management begins before fabric is spread.
The cutting team should receive and use the information generated during fabric inspection, including cuttable width, shade, defects, roll conditions, and other production-relevant characteristics.
Cuttable width should be practical—not excessively tight and not unnecessarily conservative.
Stretchable fabrics should be properly relaxed, and spreading should avoid reintroducing uncontrolled tension.
Shade should be managed by actual fabric condition, not only by lot or roll number.
Special fabrics such as stripes, checks, prints, and other pattern-sensitive materials may require specialized marker and cutting methods.
After cutting, numbering and bundling should preserve lot, shade, lay, and garment identity through sewing.
Most importantly, the cutting room should not operate as an isolated department.
The information flow should continue:
Fabric Inspection → Fabric Preparation → Spreading → Marker & Cutting → Numbering & Bundling → Sewing
When that information remains connected, the factory has a much better chance of controlling fabric utilization, garment quality, production quantity, and cost.
Good cutting-room management is not simply about cutting fabric accurately. It is about converting the available fabric into the maximum practical number of correct, traceable, production-ready garment components without losing the quality information already learned upstream.
Need Help With Cutting Room & Fabric Utilization?
Apparel Production Lab provides practical consulting for fabric management, marker and cutting planning, garment production, quality control, costing, and production-risk management.
Whether you need help improving cuttable-width control, fabric relaxation and spreading, shade management, special marker requirements, cutting-room traceability, or actual fabric utilization, we can help develop a practical production approach around your product and factory requirements.